Fix: User Profile Service Failed the Logon & User Profile Not Loaded
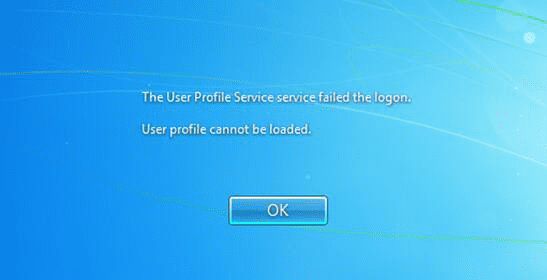
You’re trying to log on to Windows 7 as usual, but an error message appears “The User Profile Service failed the logon. User profile cannot be loaded”, which means that you cannot boot your PC normally, not even after restarting.

When the error message appears, it possibly means that Windows does not recognize your user profile correctly. The case could happen if your antivirus software is scanning your computer system when you try to log on. The quickest and easiest solution is to restart your PC. If you’re so hurried to try anything, just restart the computer now. If it doesn’t work, however, one of the methods in this article might help you when Windows user profile cannot be loaded.
Method 1. Fix the User Account Profile Cannot Be Loaded
When the user profile service failed the logon, we can try to fix the corrupted profile in Registry Editor. The process will involve modification to the registry which is sometimes risky. Make sure to follow every step carefully.
- Step 1. Press Win + R at the same time, then type regedit in the Run box and hit Enter.
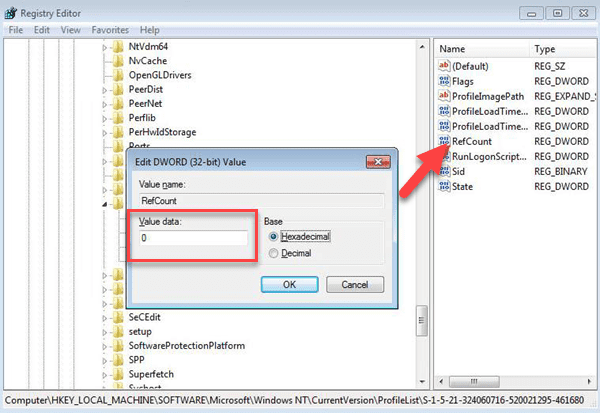
- Step 2. In Registry Editor, navigate to HKEY_LOCAL_MACHINE\SOFTWARE\Microsoft\Windows NT\CurrentVersion\ProfileList
- Step 3. Expand ProfileList and you will find one or two folders begin with S-1-5 followed by a long number.
- Step 4. Click each of the mentioned folders, then double-click ProfileImagePath on the right pane. Check the Value data field to make sure it is the user account profile that has the error.
- Step 5. Rename the folder(s) beginning with S-1-5 followed by a long number.
- If you have two such folders, please rename the one without .bak and add .ba to the end, then remove “.bak” from the end of the other folder.
- If you have only one such folder, please just remove “.bak” from the end of the folder by right-click > Rename.
- Step 6. Select the folder without .bak, then double click RefCount, type 0 in Value data and then hit Enter.
- Step 7. Still in the right pane, double click State, type 0 in Value data and then hit Enter.

- Step 8. Close Registry Editor, then restart your PC to log on with your account.
Pro tips: In case you lose important files during the process of fixing corrupted user profile, don’t hesitate to use Jihosoft File Recovery to recover deleted files from Windows 7.
Method 2. Copy Files to a New User Profile
In case Method 1 doesn’t work for you, you can create a new user profile, then copy files from the old account to the new one.
Part 1. How to Create a New User Account
- Step 1. Click the Start button, go to Control Panel > User Account.
- Step 2. Click Manage another account > Create a new account.
- Step 3. Type your account name, select a user type, then click Create Account.
- Step 4. Restart your PC.
Note: You may need to enter the administrator password in Step 2.
Part 2. How to Copy Files to the New User Profile
- Step 1. Log in as a new user in your computer.
- Step 2. Click Start button, then choose My Documents > Computer.
- Step 3. Double click on the system drive (usually the C: drive), then go to Users\[User name]\My Documents.
- Step 4. Click the Tools menu, then choose Folder Options.
- Step 5. Switch to the View tab, then click Show hidden files, folders, and drives.
- Step 6. Untick the Hide protected operating system files box, then click Yes > OK.
- Step 7. Navigate to C:\Users\Old_Username, then select all the files and subfolders except the following:
- Ntuser.dat
- Ntuser.dat.log
- Ntuser.ini
- Step 8. Copy and paste the above files and subfolders to C:\Users\New_Username.
- Step 9. Restart your computer and make sure to log in with the new user profile.
Note: Don’t delete or cut and paste the old profile unless you find everything is working properly in the new user profile.
Method 3. Delete the Error SID and Create a New Profile
SID, short for Security Identifier, exists in user profiles. If a user profile is deleted manually, the SID is still there, and Windows will try to load the user profile by using the ProfileImagePath which points to a nonexistent path. Therefore, we need to delete the error SID, and then create a new user profile to make Windows work again.
- Step 1. Click Start button, right-click Computer, then choose Properties.
- Step 2. Click Change settings.
- Step 3. In System Properties, open Advanced tab.
- Step 4. In User Profiles, click Settings.
- Step 5. Select the profile that you want to delete, then click Delete > OK.
- Step 6. Click Start button, type regedit and hit Enter.
- Step 7. Navigate to the following location:
HKEY_LOCAL_MACHINE\SOFTWARE\Microsoft\Windows NT\CurrentVersion\ProfileList - Step 8. Right click on the SID that you want to remove, then click Delete.
- Step 9. Create a new user profile as described in Method 2.
After that, you can copy files from your old profile to the new user profile as shown in Part 2,
Method 2. It should be noted that manual deleting the user profile folder is not recommended. We also need to be careful while using junk file cleaner software.
Bottom Line
In this tutorial, we have learnt 3 methods to fix the error of user profile failed the logon. Now you should know how to save your computer as well as the user data when the user profile cannot be loaded in Windows 7. Feel free to tell us you have any questions or suggestions in the comment. Please stay tuned for more tips and tricks about Windows PC, like how to fix error “There was a problem resetting your PC.”

