How to Repair Broken Buildings or Other Objects in Photos
Photography is one the best forms of communication. A photographer captures amazing moments through the his/her camera, and communicates so many emotions & expressions through it, to the person who finally views it.
A decade back, this form of expression was mostly limited to professional photographers who wielded their mighty DSLRs to capture some amazing moments. However, with smartphones being so common amongst everyone these days, and their cameras becoming so good, everyone now has the ability to share and express through amazing images.
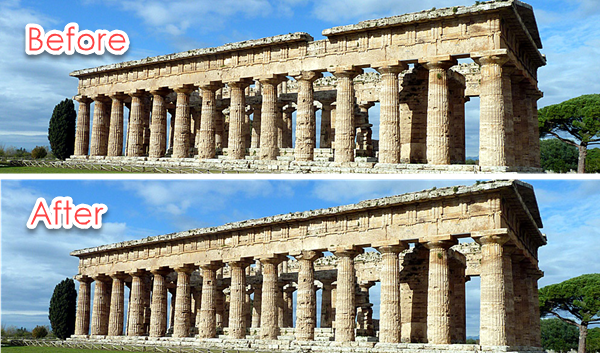
However, many times an almost perfect shot is ruined by the presence of some unwanted objects. It may be a person photobombing your image, or a bird flying through the frame at that exact moment, or the building that has been photographed is broken which is causing the image to look defective. Either ways, such a situation can be really frustrating for the photographer.
People then search for tools to fix such images, to remove the unwanted birds flying through the image or to repair the broken parts of the building in photos,. Though there are many such tools available, most are pretty complex and unintuitive to use for amateurs, for example, Photoshop. In this article we will share a software that is very powerful, yet easy to use.
Part 1. Jihosoft Photo Eraser: Fix Broken Building in Photo
Jihosoft Photo Eraser, as the name suggests, is a very powerful photo eraser tool that allows users to remove unwanted objects from their photos. But unlike its many counterparts, it is quite simple and easy to use.
The whole interface of the software is pretty minimalistic and clean. It focuses solely on what needs to be achieved and doesn’t overburden the user with too many options and settings.
The application is available for Windows now. Its system requirements are also pretty minimal and will run without any issue on all desktops and laptops as old as 3-4 years. You can click on the download button above to download and Try Before Buy.
When you open the application after installation, the main screen opens which has the tools neatly arranged on a bar on the left side. The central pane has option to select/import photo. You can also import multiple photos at once and all of them are stacked in a list which is shown in the right most pane.
Tip: You can learn more about the tools in Photo Eraser here.
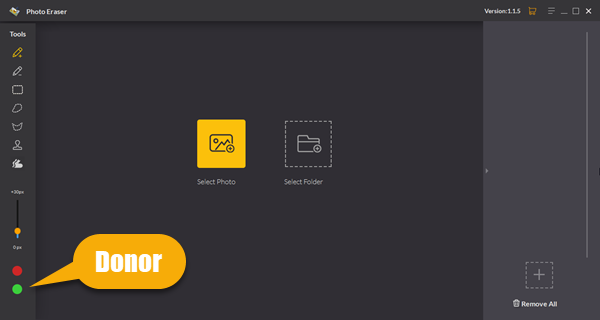
Part 2. What is Donor in Photo Eraser?
It also can be called Green Donor Mode, which allows you to choose which parts of the photo are used to fill the missing area.
All photo repair softwares use some existing information in the image to repair the image. They do this by duplicating the existing data over the data to be removed. Hence it is necessary to tell the software what data it should take as reference. And we use the Donor to do that.
Part 3. Steps to Repair Broken Objects in Photos
Repairing the missing parts in photo is also very simple. Below we will show you how to use the Donor tool to repair the broken objects in your image.
1. Import image
First we need to import the image that we want to repair. To do that just click on the Select Photo button found in the center of the main pane of the application.
Upon clicking it, you will get the default file opener of the Operating System you are using. Just navigate to the right file and open it in the application.
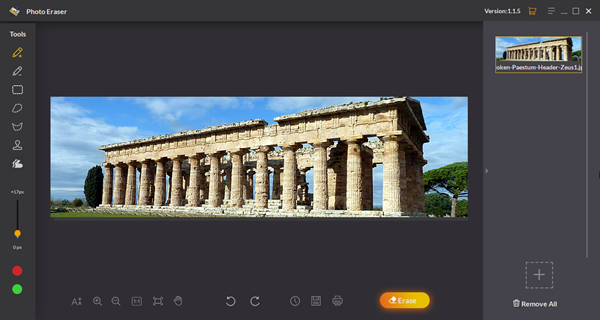
2. Select the broken parts
Once the image has been opened in the application, use the Selection Brush tool to mark the area that needs repairing.
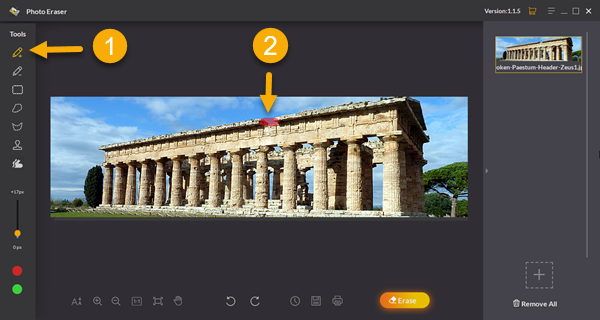
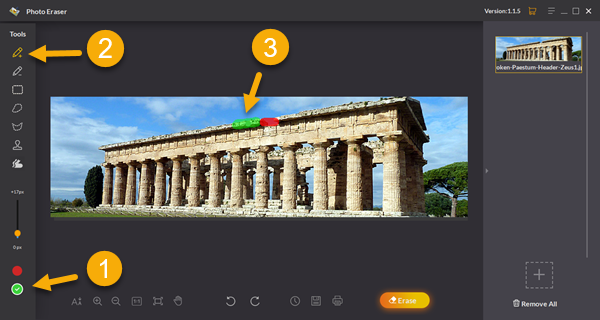
For instance, in the image we have opened for demo, a part of the structure is missing, as marked by arrow 2. We want to repair this image and complete the structure so that it does not look bad. So we will brush over this area with Selection Brush tool. This tool is present in the left sidebar and is pointed in the image by arrow 1.
When we brush over the area that needs to be selected, that area is shown by red color. This tells us which area we have selected.
3. Select Donor parts
With the area to be repaired selected, we now have to select the area which we want the software to use as reference for the repair work.
First, we should click on the Green Donor tool marked in the image below using arrow 1, otherwise all your selection areas will be covered with Red color instead of Green color. Then choose any selection tool, for example Brush Selection tool, to select the area to be taken as reference. The arrow 2 shows the area we have marked in the photo. This area is shown by green color.
4. Start the repair process
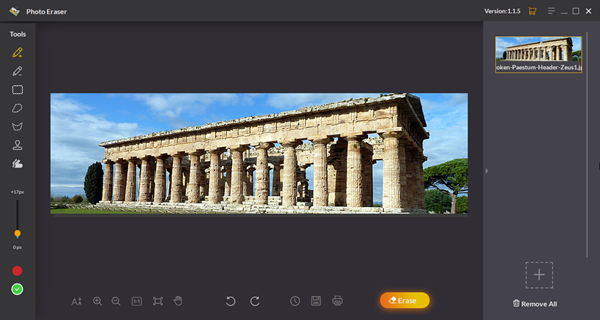
Once the missing area to be repaired, and the donor area, both are selected, we need to click the Erase button at the bottom right of the software.
When you click this button, the software does its magic in the background and repairs the image as can be seen below.
Additional Features
Apart from repairing photos as shown above there are plenty of other features that Jjihosoft Photo Eraser offers its users.
Some of these features are:
- The tool allows user to remove unwanted objects from the photo. This can be tourists, birds flying in the sky, clouds and even buildings.
- It allows users to remove watermarks, logos, emojis, stickers and other texts without affecting the image.
- It helps to reduce wrinkles and skin blemishes on people’s faces. Portraits can be retouched to give the professional look.
- It can do the restoration of old photos by removal of scratches and faded ness of old images.
- It allows users to clone any objects in the photos. This can help in creating unique images.
If you want to know more other tutorials on photo editing, please leave your comment and let me know. We must do our best to meet your needs.
Final Thoughts
So if you are looking for a tool that is powerful at repairing your images, offers a whole lot of features and is also dead easy to use, then Jihosoft Photo Eraser is the best software you can use.
This software has been designed from the ground up with photo repairing in mind and it does it exceptionally well. And its available on both the popular desktop platforms so everyone is covered.
If you are not sure about the app, there is also a free trial on offer. You can download and use the trial version of the software to test out the features it offers and then make up your mind to pay a one time fee for lifetime license and support. However, we are quite convinced that once you use the application a few times, you won’t want anything else.

