How to Make a Photo Background Transparent for Free
In our daily lives, we capture a lot of photos, maybe it is our own photo or of some object or maybe something that’s important for us. But, one thing which is important for any and every image or photo is the background. The object that you are focusing upon must be surrounded with a proper background to make it look focused and aesthetic.

There are times when we do take some great picture but due to a bad or unclear background, we just have to delete the photo. Also sometimes we may have captured an image specifically focusing on an object and we need only that and put some solid color in the background. All these situations require to make the background of the photo transparent at first.
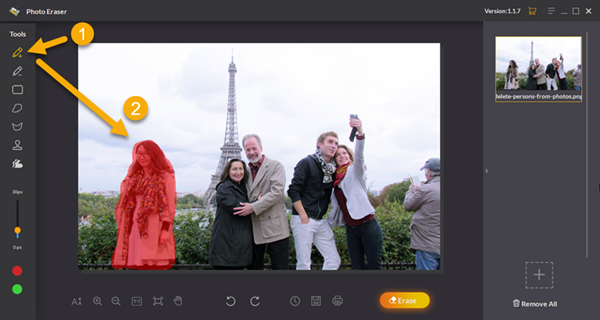
Tip: You can also choose to directly remove the unwanted objects from the photo background with Jihosoft Photo Eraser editor.

What is the use of making the image background transparent?
A transparent background image has a lot of the utilities, but it has requirements on basis of what type of image you want to make:
- You may end up making your own image background transparent which in turn helps you to get the only part of yourself and use it to make a college or any cover picture.
- It may happen that you want to show off your image to your friends and fans, so you can cut yourself from an image and use some other innovative background like hills or seashore to make the outcoming image more attractive.
- Also, you might end up in need of a quick image of yourself for any official work. It will help you remove any anomalies in the image background and make it look more presentable officially by making the image background of any of your good image transparent and adding any solid color to it.
- Sometimes we require our signature for any official document use, but even we scan our signature image, the background still remains the same and it looks vague when we insert such image in the document. In such kind of situation, removing the background from photo is the only and the best solution.

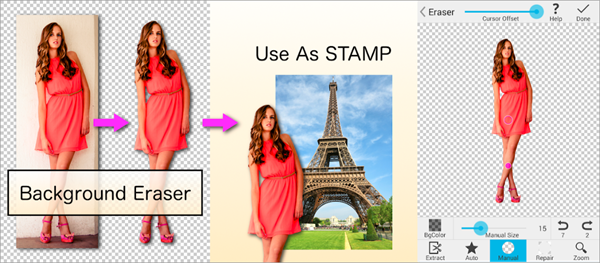
Now, to help you remove the background from the image, we will be telling you a few simple steps. Well, do not get scared too, no Photoshop or any specialized software is required. There are a lot of apps that help to get the thing done but here we have taken the best and the most efficient Android app in this sector – Background Eraser which is readily available at the Play Store.

Here are the 5 simple steps to make picture background transparent with this free background eraser tool:
Step 1. Open the app and simply open an image that you want to edit the background.
Step 2. Crop the image according to your need, click on the “done” option to finish this process. You can even crop images into circle and other shapes with this tricks.
Step 3. Now you’ll see that there are a lot of options in the down taskbar, each has its own use:
- The ‘Manual’ mode, as the name sounds, is the simplest model that can be carried out by you. With this manual mode, you can touch down all the areas which you intend to make transparent, but you need to be careful with the edges of the object that you want to cut down. Pinch on the screen to zoom in and out so that you can do the job in an acute way.
- The ‘Magic’ mode is a bit smarter mode which not only helps you to touch down the areas to make them transparent but also it intelligently helps you with the edges of the object, which colors tricky at times. The magic mode helps you to keep the edges of the object or person, that you want to cut down, as usual.
- The ‘Auto’ mode is furthermore intelligent as it make this app an automatic background remover which automatically makes those areas with similar color transparent. Like if you are editing some photo with a white background, the ‘Auto’ mode comes in very handy as it helps you to make the complete white area transparent, which is truly helpful in most of the situations.
Furthermore, the brush radius can be changed according to your needs as per the modes including Magic and Manual, which helps you to complete your work much more faster and accurately.
There’s also a ‘Repair’ option that helps you to bring back the original color even if it gets removed manually, or with the magic or automatic modes. This option helps you to reverse back even if you have done a major blunder while making your image background transparent.
Step 4. Having done all the edits and the little finishing on your image, you can tap on the “done” option. This will redirect you to choose the background color as white transparent or black transparent, just select accordingly.
Step 5. Then you also get to select from the variable range of smoothness level ranging from 0 to 5. Choose the smoothness level according to the type of picture, the further you choose the smoothness level the more your image becomes blunt.
Now after doing everything, you manage to convert image background to transparent. Just save your edited image and the image gets stored in your internal storage under the Picture Eraser folder by default. The extension is for all the edited final images that are in png, as because it is the only image format that supports transparency. You can use this picture anywhere you want according to your need.
Tip: If you unfortunately deleted/lost your photos on Android, you can use this method to recover deleted photos from Android.
So, with such few simple steps you can edit and completely change your image background, keeping the object intact. Just a bit of retouching the image and you’ll get a high quality object image with a transparent background which you can further use for various collage or for making cover photos and in more applications.
Using the app, from a Pro to novice anyone can get his or her job done within a few minutes as the steps are so simple. This background eraser app itself is very light and takes only 2.4 MB space on your Android device. So, simply use the app, follow the steps mentioned and you can easily remove background from images.

