How to Transfer iPhone/iPad Photos onto PC Windows 10/8/7
There are so many ways that you can access and save all your iPhone photos on PC Windows 10/8/7. In this article, we will tell you about tricks to help you transfer iPhone photos to your Windows PC. You can use these methods mentioned below to manage your iPhone photos via Windows PC with or without without iTunes, even if you don’t have your iPhone available. If your iPhone gets stolen or damaged accidentally, then the iCloud method will prove themselves to be an asset for you. Moreover, these methods are easy to use and most of them don’t require the clumsy iTunes.
How to Manage and Transfer iPhone Photos on Windows 7 PC
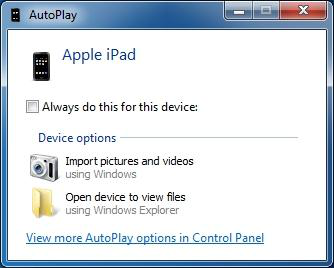
For Windows 7 users: After connecting iPhone with your PC, normally you can directly view your photos in the folder view by going to the iPhone disk. However, if you want to transfer your photos from iPhone to PC (Windows 7) all at once, then follow these steps.
- First of all, connect your iPhone with the PC using suitable cable.
- Then the AutoPlay window will appear with an option “Import pictures and videos. Select it.
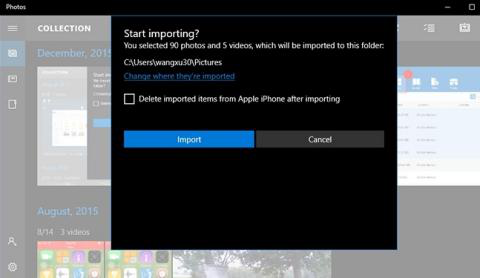
- After that press the import option to start importing photos.
How to Import & Transfer iPhone Photos onto Windows 8 PC
For Windows 8 users:
- Use USB cable to connect your windows 8 PC and iPhone. It will take some time to read the data and after that you will be able to discover your iPhone.
- Click on computer, right-click on your iPhone icon and choose “Import photos”.
- If you are importing the pictures for the first time from your iPhone, then click “Review, organize and group items to import”; if not, then select “import all new items now” to avoid duplicate.
- To select the folder in which you want to import the files, click on the “More options” icon there.
- Select the number of pictures you want to import and then click on “import” icon there.

How to Access and Transfer Pictures from iPhone onto Windows 10 PC
For Windows 10 users:
- Plug in iPhone to PC via lightning cable.
- Open the default Photos app on your PC and click on the “Import” icon present on the home screen.
- Then select the pictures you want and click on the “Continue” button to transfer iPhone photos.
Using iCloud Photo Stream to Access your Pictures on Any Windows PC
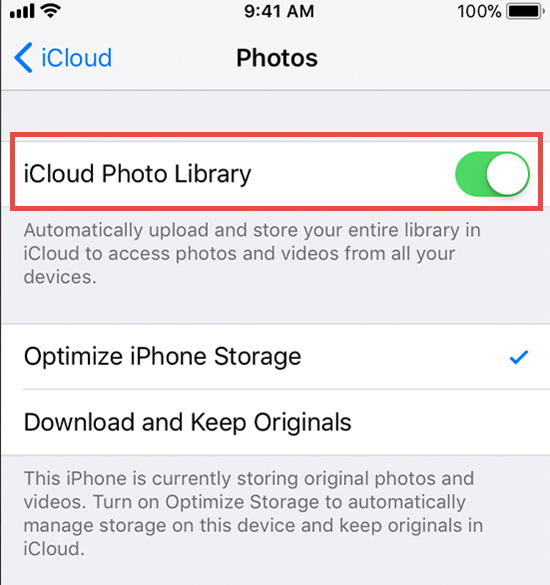
However, if you have enabled the iCloud Photo Library for your iPhone, then you need not wire your iPhone to the computer. It allows you to transfer or import all the pictures and photos wirelessly from your iPhone to your Windows PC online.Just follow The steps below:
- First of all, you have to download iCloud for Windows on your PC.
- Then go to Settings on your iPhone > [Your name] (iOS 11 & later) > iCloud > Photos.
- You will see the option “iCloud Photo Library” (in iOS 12 just “iCloud Photos”), turn it on. Additionally, you can also enable“Upload to My Photo Stream”.
- Now, it will automatically sync all your photos to iCloud under network, and later you can access them at iCloud.com on your windows computer.
Accessing Pictures from iPhone Using Email
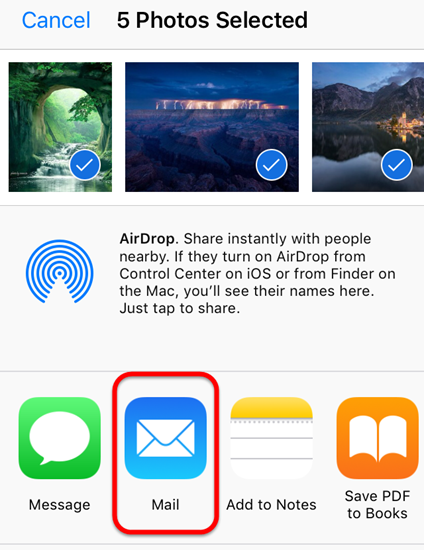
Traditionally, you can always send your photos to PC by Email, though the process may be tedious since it needs manual operating.
- Open the Photos app in your iPhone.
- You can select images of your choice but not more than 50 MB at once.
- Click on the “share” icon, and select the “Mail” option from the list of suggested apps popping up.
- Transfer the pictures with the help of Email to your computer.
Use Jihosoft iPhone Data Recovery to Import Photos from iPhone on PC
Besides for iPhone photo recovery, the professional software Jihosoft iPhone Data Recovery can also be used to import some or all of your iPhone photos at once. It’s very easy to use, and you just need to follow these steps below.
- Launch Jihosoft iPhone Data Recovery and select “Photos”.
- Connect iPhone to PC, and click “Next” to start scanning.
- Select part or all of your images in the preview page and click “Recover” to save them to PC.
Final Thoughts
Now, we hope that you are all clear about the methods explained above.These method has been tested for transferring iPhone photos to Windows computers. You can also employ some of them even if you don’t have your iPhone with you. If you had any other trick or question, please drop a comment and share with us.

