How Do I Remove Unwanted Persons and Tourists from Photos?
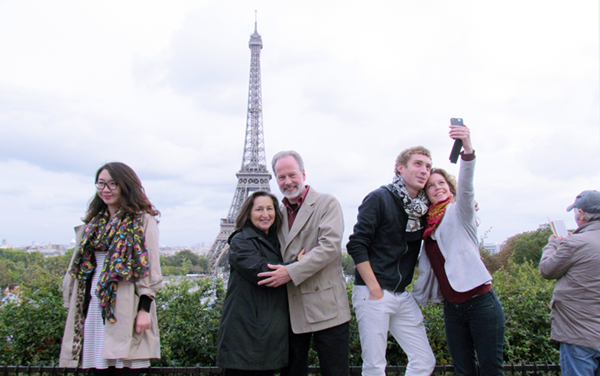
If you like travelling and taking pictures souvenir to capture the moments of the excellent memories, you may always find that inevitably you will come across a scenario where there is someone that sneaks into your image that you either missed or cannot control. Or the thing that spoils your photographs could also be a tree branch, a dust spot on your lens, or in this case, a distracting marking on the wall of a building. So we have to edit the unwanted people out of the picture.

While lots of editing softwares are there to do the job for you, many of us may think Photoshop is the best choice to remove unwanted items from photos. But Photoshop requires a good PC hardware and Photoshop knowledge to do that.
But with Jihosoft Photo Eraser you will never face that problem again. This auto photo eraser enables you to quickly and easily remove tourists and crowds from photos. It does what its name states, works flawlessly in erasing unwanted persons, watermarks, skin blemishes and other items from the photos.
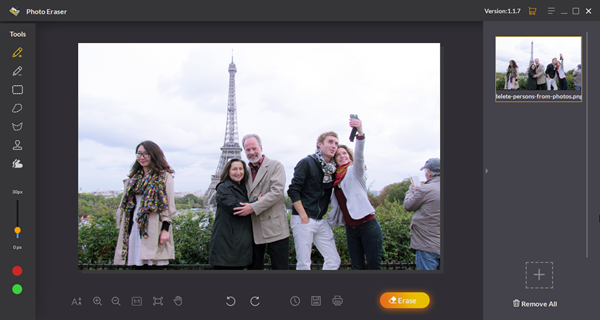
Jihosoft Photo Eraser is having a neat user interface with a few important tools in the toolbar. The toolbar is on the left side of the application, it consists of a few useful tools for erasing unwanted stuffs and enhancing the photos.
Here are the various tools that are included in the Photo Eraser software:
- Rectangle Selection Tool – This tool is used applying Red Mask and Green Donor on the pictures in a rectangular shape.
- Lasso Selection Tool – This another selection, familiar to those who work on Photoshop. You can freely select the area to apply a red mask and green donor. Drag over the area you want to select.
- Polygon Selection Tool – Selection tool to apply the red mask and green donor, just click on an initial point over the area of the object and release it. Continue doing this until the object is covered.
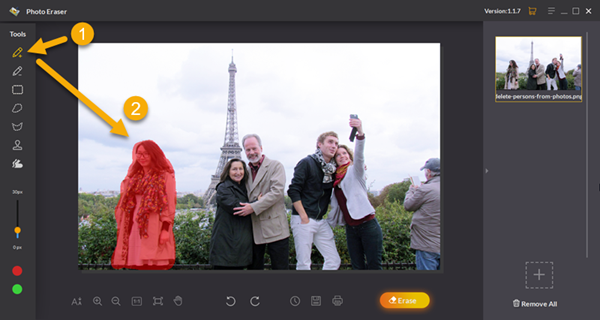
- Selection Brush Tool – This tool looks like a pencil with ‘+’ sign beneath it. Select the unwanted items by brushing over that item, even you can change the size of the brush tool using the Brush Size Slider.
- Fix the Selection Tool – This tool is kind of similar to the Selection Brush tool, this looks like a pencil with ‘-’ sign below it. This tool fixes the selected part if there is some problem with the image, just the brush the area you want to fix.
- Sampling Stamp Tool – This tool is really easy to use, and it first allows you to copy an area from the photo and the use that selected part to fix any other area of that photo. Like removing birds from the sky, just copy a part with no birds on it and cover it over the birds.
- Smart Clone Tool – This tool is used for cloning any person or object in the photo. Just select which item or any part of the photo you want to clone and duplicate that in the photo on any other area.
- Red Mask – By default the selected area will be covered by this Red Mask if you are using any selection tool from the toolbar on this application. This selected red mask area will get erased when we will select the Erase button.
- Green Donor – It is similar to the Red mask as it also marks the area you have selected. You will need to click on the Green Donor button first and then all your selected area will be covered with green mask. This feature is used for fix any missing part in the photos, for example, you can repair a broken building in the photo.
Steps to Edit Someone Out of a Photo
- Download Jihosoft Photo Eraser from the bottom above, and install it according to the operating system in your PC. This software is available for both Windows and Mac.
- After installation is complete, run the software and when the application opens up click the ‘Select Photo’ for selecting a single photo or ‘Select Folder’ for selecting an entire folder from your PC. By this way, you can import the photo that include a persons that you want to remove.

- After the photo is opened in the application, click on the ‘Selection Brush Tool’ from the application toolbar, it looks like a pencil with a ‘+’ sign on it. Then brush over the unwanted person with this tool, even you can adjust the size of the brush according to the size of the unwanted item by using brush size slider or you can even zoom in or zoom out the photo instead.

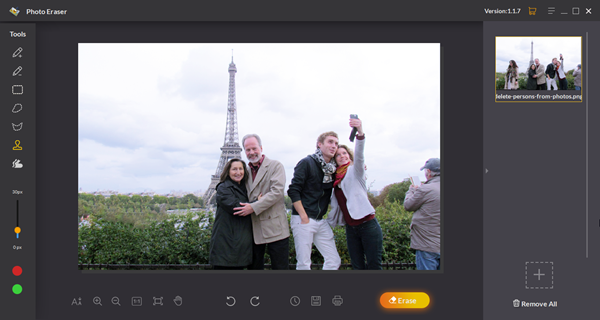
- After the selection process is done perfectly, just click on the ‘Erase’ button and wait for the processing to be completed. It usually takes a few moments, depending on the complexity of the unwanted area.

- Now your unwanted persons are removed from the photo, repeat this above process on all other photos with unwanted tourists or crowds to remove from.
Tip:
It’s also worth noting that try to erase tourists from photos bit by bit without rushing to remove all the persons at once. Normally, you will get a better result by removing it slowly than removing the whole item at a time.
Conclusion
We definitely recommend this software, which you can download this software for both Windows and Mac from the link provided above. This software is initially available for a free trial, you can even buy the full software if you are satisfied with the erase result by using the trial version.
You will have all the tools and features in the free trial which are present in the paid version. The only difference between the free and trial versions is that while saving the edited photo you will have the software watermark. And in the Paid version you can save the edited photos without the watermark of this software.

